
The Edsby Content Builder enables teachers to create rich course content with embedded Edsby objects in both classes and Professional Development groups. The use of the Content Builder can vary from a few pages added into the usual mix of assignments and lessons to full online learning courses complete with online testing and automated grading.
Jump to a section
Embedding Items in the Content Builder
About the Content Builder
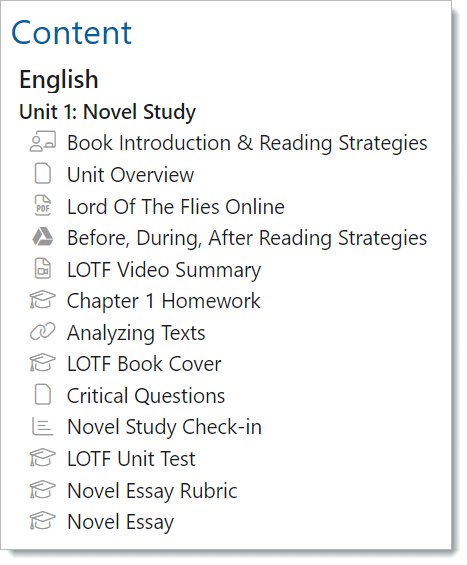
The Content Builder is accessed within a class by clicking the Course Content panel on the left side of the screen underneath the Students panel. From here, the Course Content can be edited by clicking Edit in the top left. Clicking the + next to an item in the Course Content provides the teacher with a list of additional content items that can be added to the course underneath the selected item:
| Section | Optional. Divides a unit into smaller segments. |
| Unit | Organizes the Class Content. Only available by clicking the + next to the Class name. The Gradebook can be sorted by units as well. If units do not apply to the class, consider creating one unit named Term Work. |
| Page | Stores content. Includes a rich text editor. Pages can include images, equations, and multiple links. |
| Assessment | The same workflow applies no matter where the Assessment is created. Fill out the Assessment Form with a title, type, and grading scheme. Additional options are available on the form. The Assessment will be cross-posted to the Planner and Gradebook. Click here to learn more about the Assessment Form. |
| Question Sheet | Create Question Sheets with a variety of question types directly in the Class for use in Online Tests or sharing with other teachers. |
| Lesson | A rich text editor for teachers to create lesson plans with notes for both students and themselves. |
| Poll | Polls the class on a question. Can be exported if created in the Content Builder. |
| Video | Records and/or uploads a video from your device, or embeds a Web Video. |
| File | Uploads one or more files to the class. |
| Google Drive Document | Uploads a Live Document from Google Drive. Any changes made to the document in Google Drive will be updated and reflected inside of Edsby. Click here to learn more about Live Documents. |
| Microsoft OneDrive Document | Uploads a Live Document from Microsoft OneDrive. Any changes made to the document in Microsoft OneDrive will be updated and reflected inside of Edsby. Click here to learn more about Live Documents. |
| Live Document | Uploads a Live Document from a URL. Any changes made to the document will be updated and reflected inside of Edsby. |
| Link | Provides a link to a web page or a video. |
| LTI Link | Add an LTI tool integrating applications into Edsby for use in the class. |
| Import | Import course materials from a variety of sources including: IMS Common Cartridge, ePub (eBook, digital textbooks, etc.), SCORM and websites. Once imported, the content can be copied in part or whole and edited as required by the teacher. |
Note: only units and the course name have the + next to them. Assessments, pages, links, polls, and files cannot have additional items associated with them.

Content Builder pages include a history tracker so older content can still be viewed.
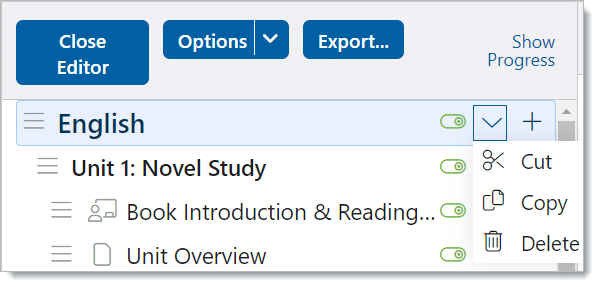
Clicking the drop-down arrow next to an item in the Course Content Editor enables the teacher three additional options regarding a specific item: Cut, Copy, and Delete.
Show Deleted
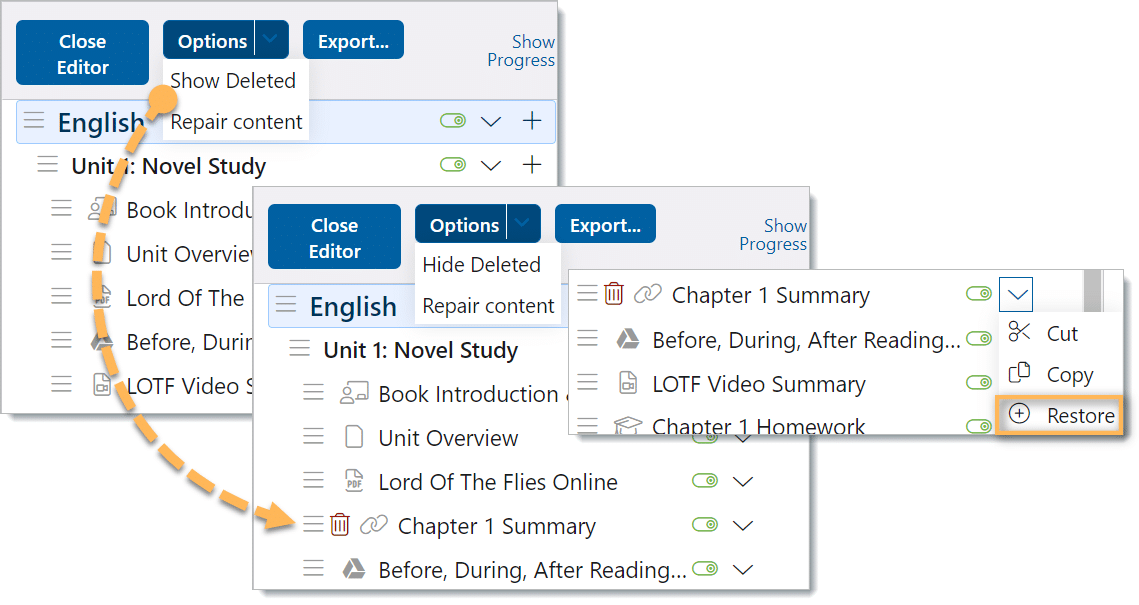
Teachers can view items that have been deleted from their course content by clicking Edit in the content panel, clicking the drop-down arrow next to Options in the left panel, and clicking Show Deleted. Any deleted items will be visible in red.
To restore deleted items, click the drop-down arrow next to a previously deleted item. Select Restore from the menu. Deleted items can be hidden again by clicking options and selecting Hide Deleted.
Reordering Content
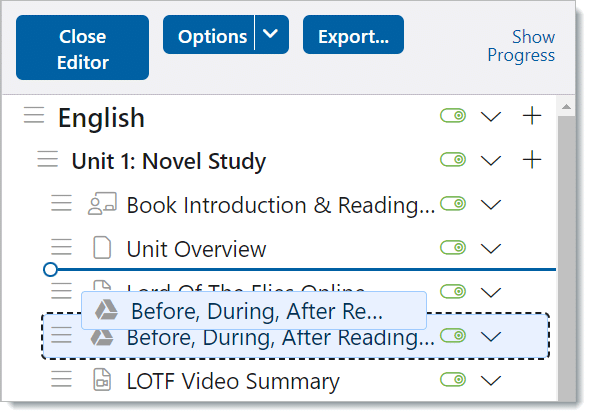
Content can easily be reordered within the Content Builder by clicking the three horizontal lines to the left of the item’s name and dragging it to the desired location. Items being moved from one unit to another will be updated with the new unit name.
Content Visibility
Teachers can change the visibility of the content at any time. Once the Content Builder’s editor is opened, a green toggle appears next to each item in the Content Builder. When the toggle is green, the content is visible to students. When the toggle is black and white, the content is not visible to students. Clicking the toggle will change the visibility. Content can be turned off at the item, unit, or class level. If an entire unit is turned off, all content items in that unit will not be visible. If the entire class is turned off, no content will be visible. Turning off content items in the Content Builder also turns it off in the Feed, Calendar, and Planner for students.

In the example above, the teacher wanted to hide the entire Chemistry unit from students in her class. By switching the Unit (Chemistry) toggle off, the toggles of all assessments, pages, links, and other items in the unit are also switched off. When the toggles are set like this, students are unable to view the content in the Chemistry unit. To hide all course content, switch the Course name toggle off. This will hide all items in the course content.
If you switch on a bottom level item (for example, an assignment or page), then all of the higher-level items containing the bottom-level item will also be switched on.
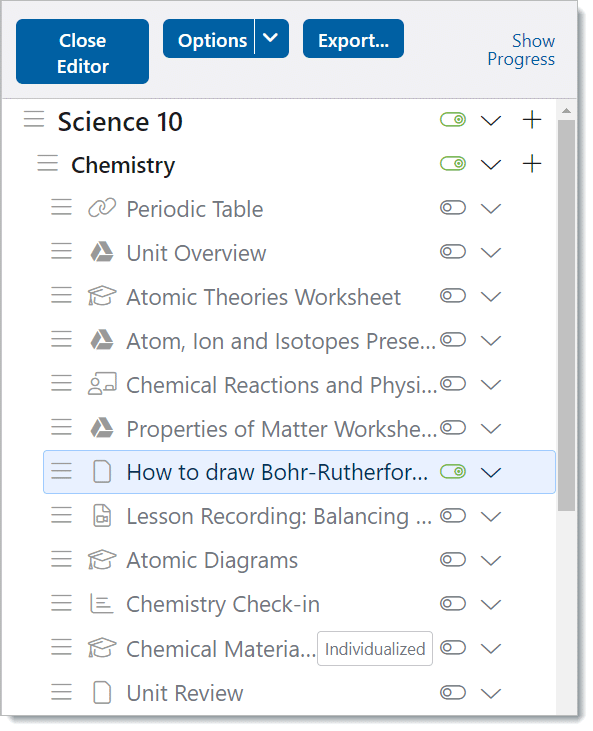
In the example above, the teacher wants to hide all course content except for the page about Drawing Bohr-Rutherford Diagrams. Since the page is a lower-level item, turning its toggle on also turns on the unit it has been created under – Chemistry. Since the unit has been created under the course Science, the toggle for the course name is also turned on.
This toggling enables teachers to easily make bulk changes to course content.
Smart Release
Teachers can also choose what content is available for students through Smart Release. Smart Release enables students to work through the Class Content at their own pace. To support this type of learning, assessments are not added to the Feed or Calendar. Instead, they are created directly in the Content Builder.
Smart Release is enabled by navigating to the Class Setup Form. Click the drop-down arrow at the top right of the class and select Setup from the menu. Under Conditional Release, select Smart Release.


When set to Smart Release, a student must open and complete each item in the Content panel before revealing the next item of Content.

If an item or section is not visible to the student through hiding it, as mentioned above, it is not in Smart Release. In this illustration, students would not see the Chemical Compound Online Quiz, nor would the students see the upcoming Biology unit.

Embedding Live Documents in the Content Builder
Live Google Drive or Microsoft OneDrive files can be linked to the Content Builder in Classes and Groups. To add a live link to a document in the Content Builder, click the + and select one of Google Drive Document, Microsoft OneDrive Document, or Live Document.
The contents of your account will appear in the Content Builder. Select the document you wish to link. In this illustration, the teacher is linking the class syllabus for her students to view. Click Save. The document is embedded within the Content Builder. As always, if you make changes to the document in its original location, the updated content is available within Edsby. Linked documents will display a Google or Microsoft icon accordingly in the Content Panel. You can jump directly to the document by selecting Edit Mode and clicking Open in Google Drive.

Click here for more information about Live Documents.
Embedding Videos in the Content Builder
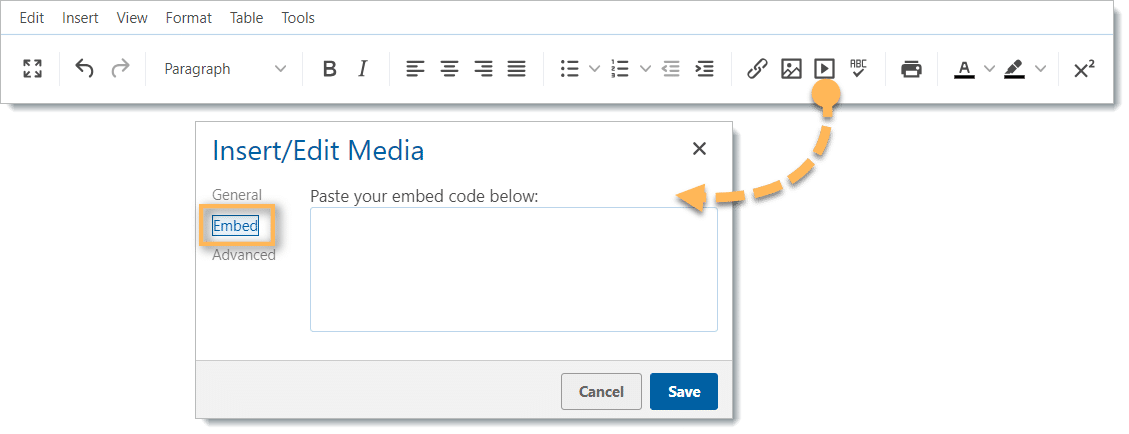
Teachers can embed content directly into a section, unit, page, lesson, video, or link. Videos and documents can be embedded from YouTube, Google Drive, or Microsoft Office 365/SharePoint/OneDrive. To embed a video, open the Content Builder, select edit, add the type of content to be created, add a title and any text, and then select media.

When the window opens, navigate to the Embed tab. Now Edsby needs the embed code for the video or document.
To get the embed code from a Google Drive video, follow the steps below:
- Using a browser, open Google Drive.
- Find the video file you want and double-click on it.
- From the three-dot menu, choose “Open In New Window”.
- From that new window, from the three-dot menu, choose “Embed item…”.
- Copy that embed code.
- Paste the embed code from Google Drive into Edsby and save.

To get the embed code from a YouTube video, follow the steps below:
- Go to YouTube and open a video.
- Click Share button, click Embed.
- Copy the embed code.
- Paste in the embed code from YouTube into Edsby and save.

To get the embed code from O365/SharePoint, follow the steps below:
Note: Before adding or viewing embedded O365 videos or documents, you must enable Third Party Cookies in your browser. O365/SharePoint will not display embedded content unless your browser has this enabled.
- Using a browser, open O365 / Sharepoint / OneDrive.
- Find the video file you want and click on it.
- From the new window, choose Share->Manage Access.
- At the top of the new window, choose Grant Access.
- Type in Everyone except external users and click Grant Access.
- Choose Share->Embed.
- From that new window, click “Copy embed code”.
- Paste the embed code from O365 into Edsby and save.


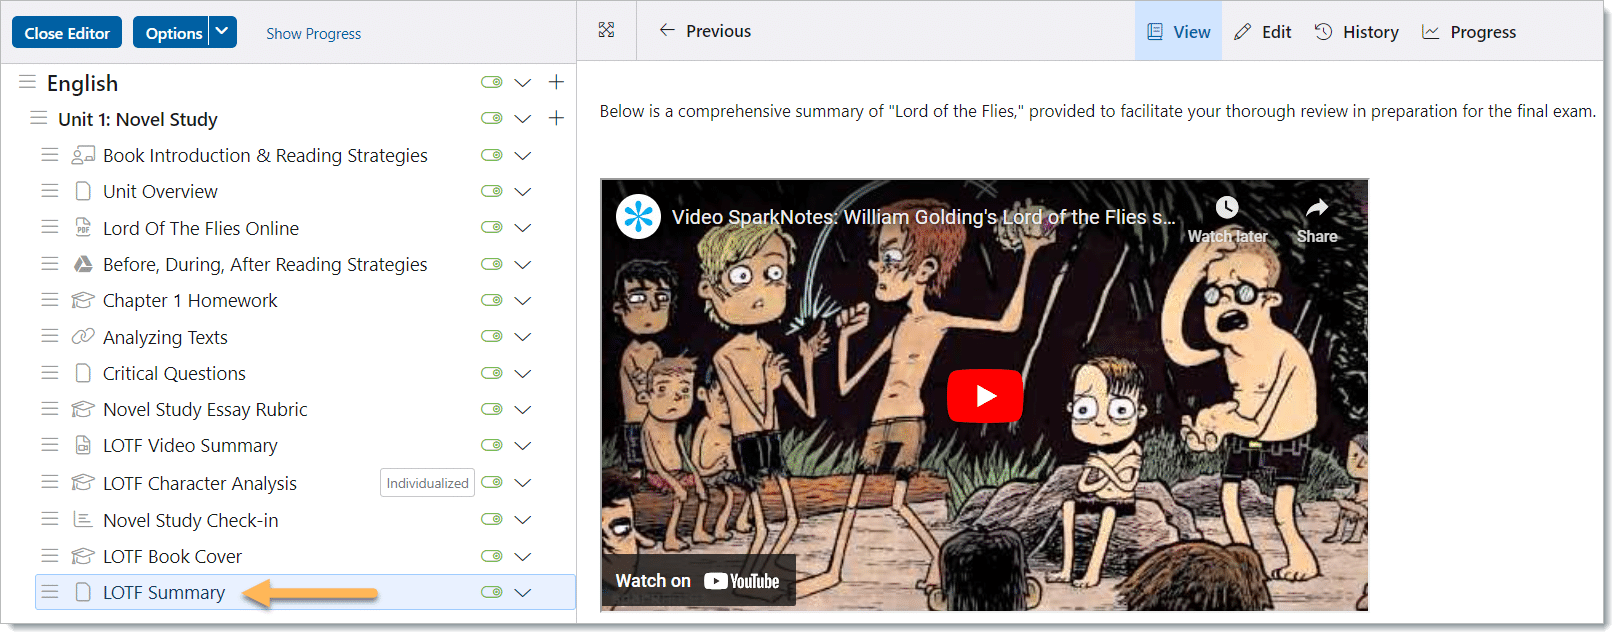
Once the embed code has been pasted into the box, click save. The video can now be resized and moved around within the content. Save the page in the Edsby Content Builder. Now the video is embedded into the content and can be viewed in the Content Builder.
Connecting the Content Builder with the Planner and Gradebook
The Edsby Content Builder works effectively with both the Planner and Gradebook to keep all assessments and units neatly organized. If a unit or assessment is created in the Course Content Builder, it will be cross-posted to both the Planner and Gradebook. The same goes for creating assessments or units elsewhere in Edsby.
Regardless of where assessments or units are created from in a class, they will be visible in the Course Content, the Planner, and the Gradebook to ensure they are kept consistent.
Copying Content
Content can be copied and pasted into other classes, Professional Development Groups, and the Personal Folder. Individual items, Units, or even the whole course can be copied. To copy an individual item, click the drop-down arrow next to that item and select copy. To copy a unit, click the arrow next to the unit name. To copy the whole course, click the arrow next to the course name. Once the content has been copied, navigate to the personal folder, class, or group the content will be pasted in.
In a class or group, navigate Content Builder or Knowledge Base and click edit. Click the drop-down arrow of the course, unit, or item and select paste before to paste the content above the item. Click paste after to paste the content below the item. Content can be copied from a previous class and pasted directly into a current class. In the Personal Folder, click New and select Course, type the name of the course, and click Create. Find the course in the Personal Folder and click on it. Click edit, select the drop-down arrow next to the course name, then click paste. Pasting content into the Personal Folder streamlines the process for teachers to locate and utilize it in upcoming classes.

Student Interaction
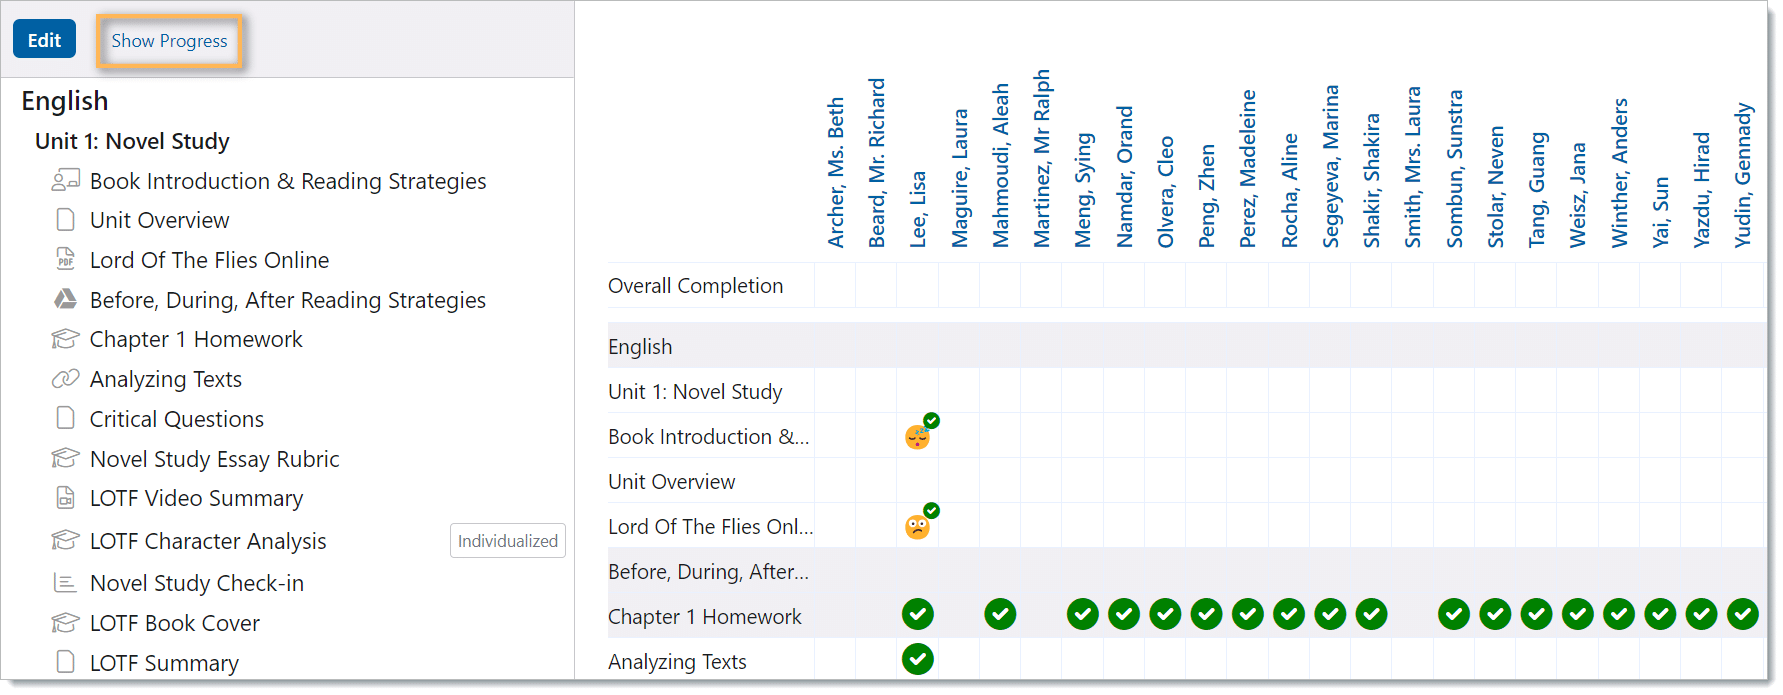
When students view the course content, they can mark the content as complete. Students can also react to the content based on their understanding of it. Teachers can view their student’s progress and reactions in the Content Builder by clicking Show Progress. Teachers can view the progress for each item in the Content Builder or for the whole course. Teachers can use the reactions to track their students’ understanding of the course material.
Student View of Content
Students can view any content that teachers have made visible in the Content Builder. Any hidden or deleted items are not visible to students. When students mark items in the content builder complete, a checkmark will appear next to the item. Students will see a progress bar at the top of the Content Builder, this enables students to see how much of the course content they have completed. Students can choose to react to the content by clicking the React button. This lets teachers know how well their students are understanding the course content.
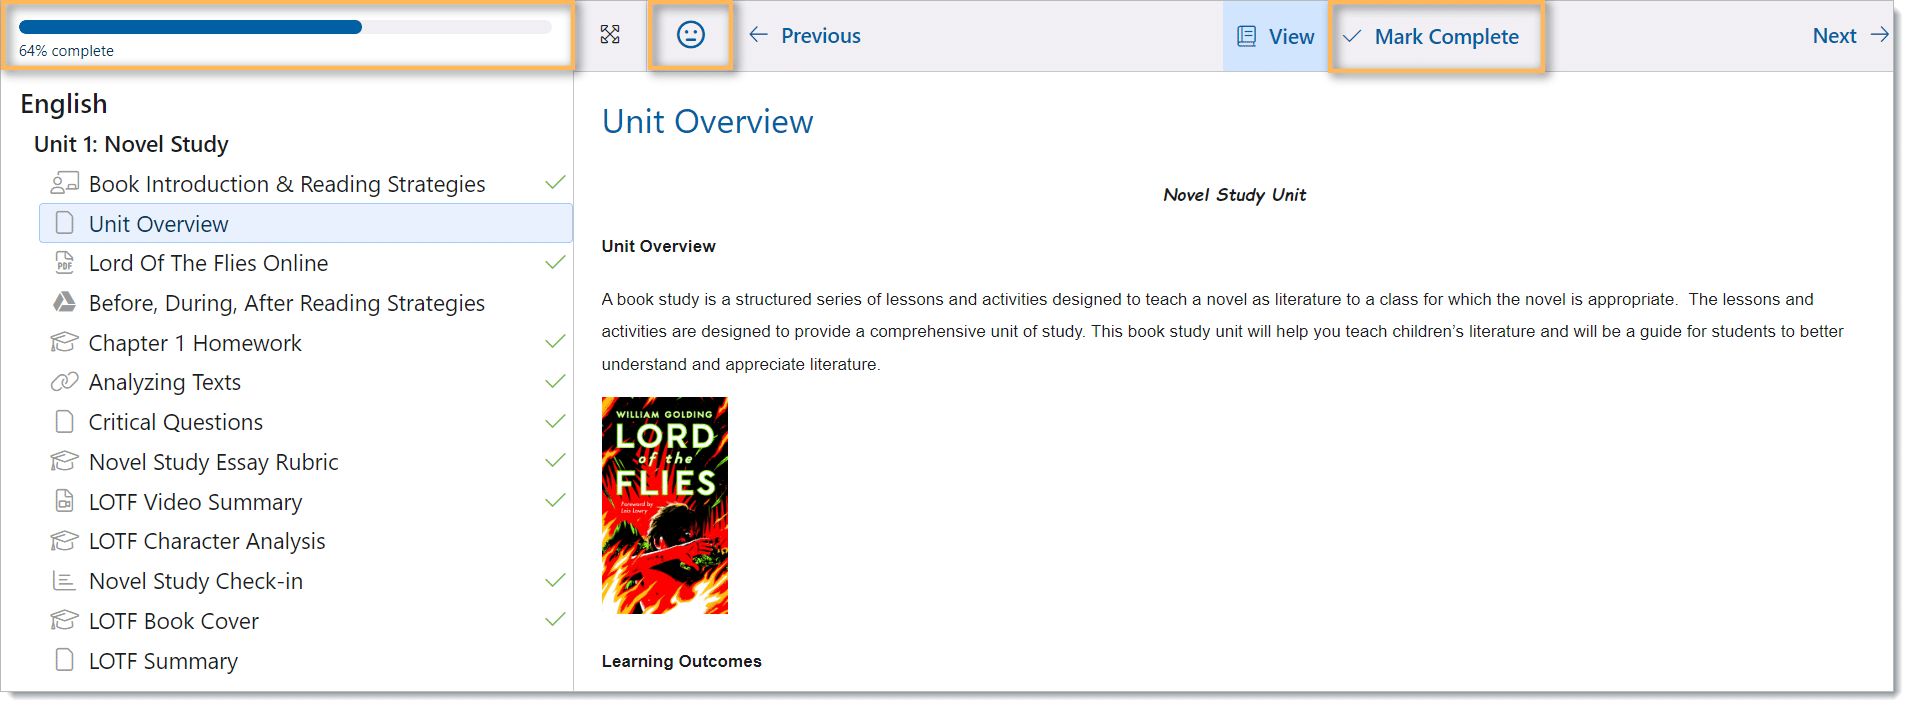
When Smart Release is enabled, students must mark each item as complete before they can view the next item in the Content Builder.