
Edsby Monitor Groups are used to monitor a list of students. Monitor Groups are Edsby groups that students and their parents never see they are a member of, but appear as a normal group for administrators and teachers if they are a member of the group.
Monitor Groups provide administrators and teachers with access to the Student Zoom information for a particular group of students and can be used for various monitoring purposes such as identifying at risk students based on attendance incidents or grades, or to monitor specific students as a mentor.
Creating a Monitor Group
To create a Monitor Group, click the pop-out in the My Groups panel or click Find More at the bottom of the My Groups panel. Click Create.

Set the group type to Monitor Group. Name the group and provide a description of the group, if desired. Select moderators, permissions, and membership for the group.
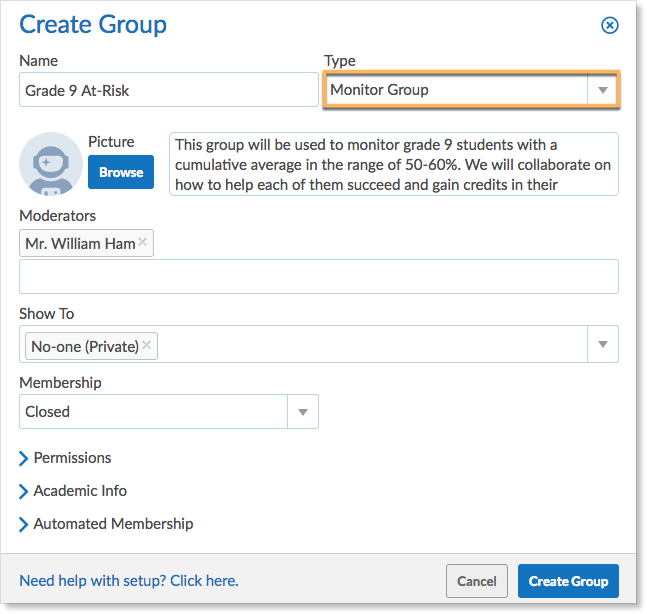
Monitor groups are initially set to be private and have closed membership. This is recommended, as monitor groups are not intended to be seen by students or parents.
In this example, William Ham, principal of Tecumseh High, is creating a Monitor Group for a handful of 9th grade students with an average in the range of 50-60% who may be at risk of failing a course. He would like to be able to monitor them throughout the rest of the semester and discuss with student success staff in order to provide the students with the necessary tools to succeed.
The group will be private with closed membership as Mr. Ham does not want the academic information of the at-risk students to be available to anyone except select staff members he will invite to the group.

When the setup form is complete, click Create Group. This will add the group to Mr. Ham’s My Groups panel.

Adding Staff and Students to the Group
To identify the students who will be added to the group, it may be useful to use the Student Zoom first. Search for the students you wish to add to the Monitor Group. Use the filters to access the target students.
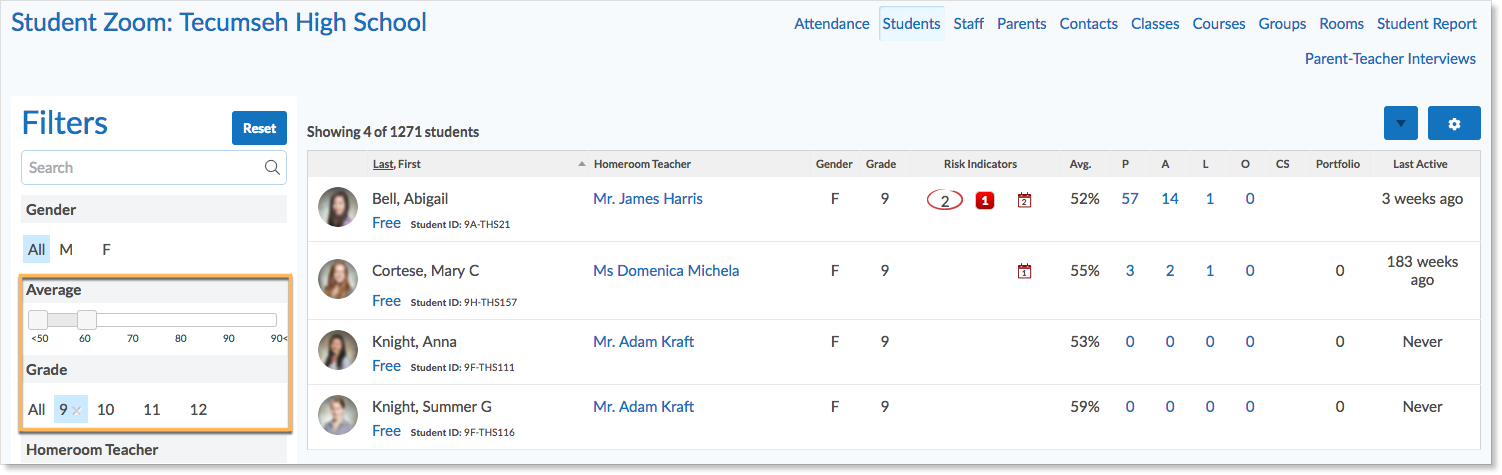
In this example, Mr. Ham is filtering the students to grade 9 with an average between 50 and 60%. These will be the students he will add to the group.
Navigate back to the Monitor Group, click Add Students.

Type in the names of the identified students. Click Add Student.

The students will automatically be added to the group; however, they will not see the group in their My Groups panel and they will not know they are a member of the group.
To add staff members, click Add Staff.

Type the name of the staff members who will be added to the group. Mr. Ham is adding Ms. Barling, a student success teacher, to help monitor the at-risk students. Click Invite Members.

This will send an invitation to the staff member for them to Accept or Decline in their My Groups panel. Upon accepting, staff can enter the group and view the academic information regarding the students in the group. Only staff members who have been invited to the group will have access to student academic information.
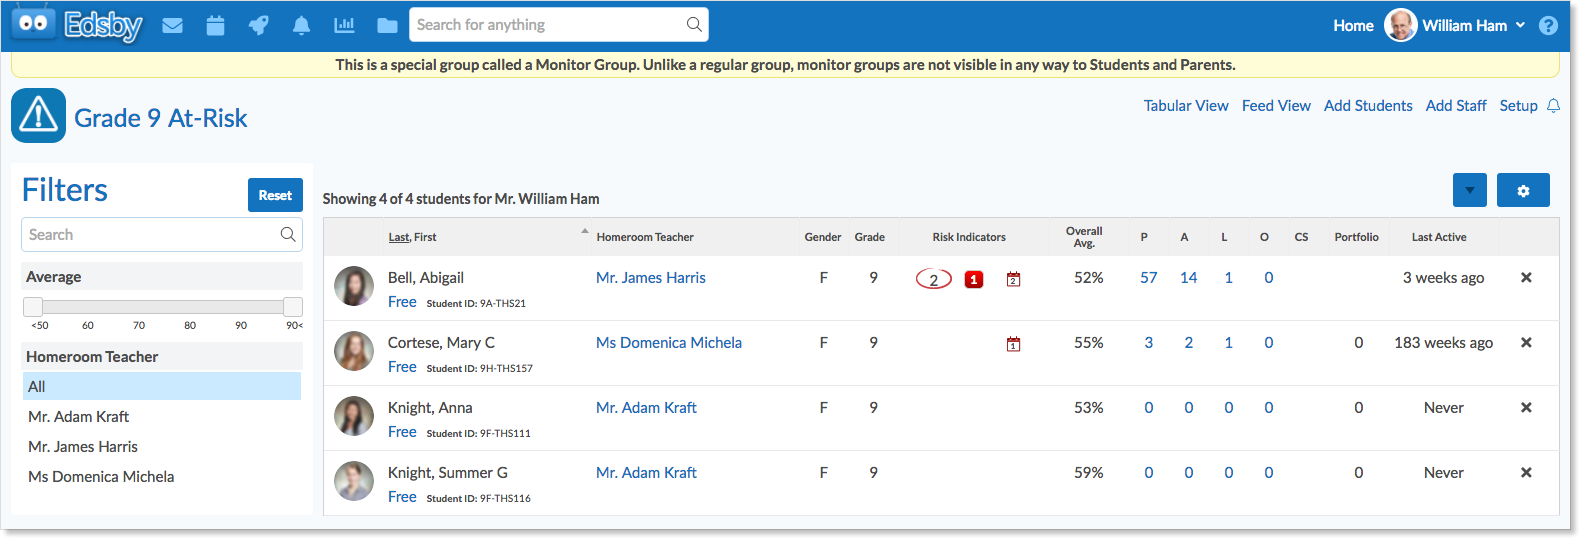
Inside a Monitor Group
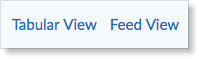
There are two different views within a Monitor Group: Tabular and Feed View.
Tabular View
Tabular View provides essentially a Student Zoom view of the students in the Monitor Group.
- There are filters on the left side of the group that can be used to narrow the list of students down.
- From this view, moderators of the group can click the drop-down arrow and select from a menu of options including to message the parents, create a planned absence, or invite to a group.
- Students can also be removed from the Monitor Group by clicking the X in their row.

Feed View
Feed View provides a classic group feed of the Monitor Group. Here, moderators and other staff members in the group can collaborate and discuss the students who are being monitored.

Creating a Planned Absence for a Monitor Group
Moderators of a Monitor group can create planned absences for members of the group. For example, the students in Mr. Ham’s grade 9 monitor group are attending a seminar on developing healthy study habits and he wishes to create an absence for them. To do this, navigate to the Tabular view of the group.
To create a planned absence for all members of the group, click the drop-down arrow and select Planned Absence.

If only a few of the students in the group were attending the seminar, Mr. Ham would create an absence for just them. To create a planned absence for selected members of the group, click the gear icon, select the students who will be absent, click the drop-down arrow and select Planned Absence.

Fill out the Planned Absence form and submit it.