

Edsby SignWave enables teachers to create, distribute, and manage field trip workflows in Edsby. Teachers can create a new field trip by navigating to the Workflows Zoom. Teachers can select a form type from one of the options listed below. This list is created by the district administrator.

For a field trip, teachers select the appropriate form and complete the required information. All fields on the form must be filled out before the workflow can be started. For this field trip, Mrs. Thompson is going to take her grade 4 students on a ski trip. She will select the Ski Trip form and fill it out.
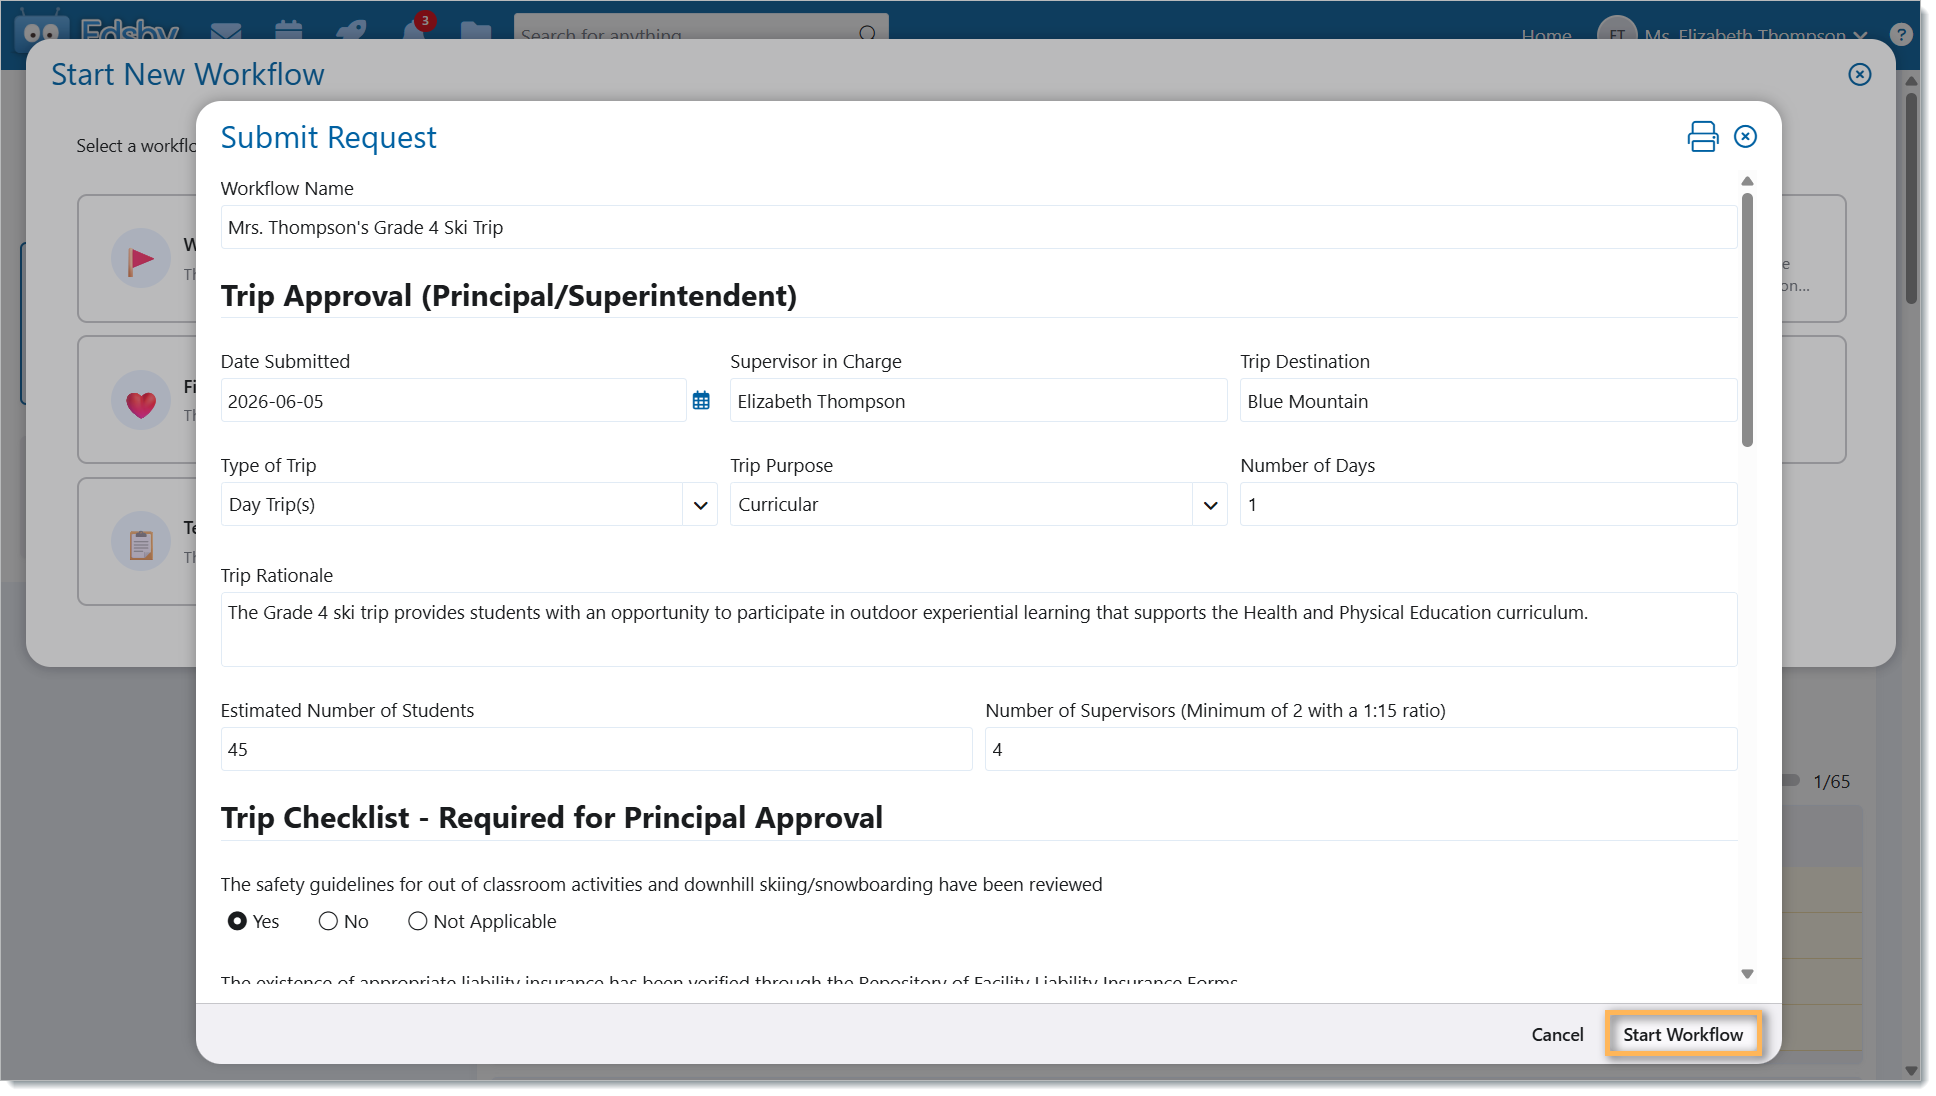
Once the form has been signed, click Start Workflow. The request for the field trip will be sent to the office for review. All field trips must be approved by the office head. Field trips that are more than one day must also go through a high-risk check by the superintendent.

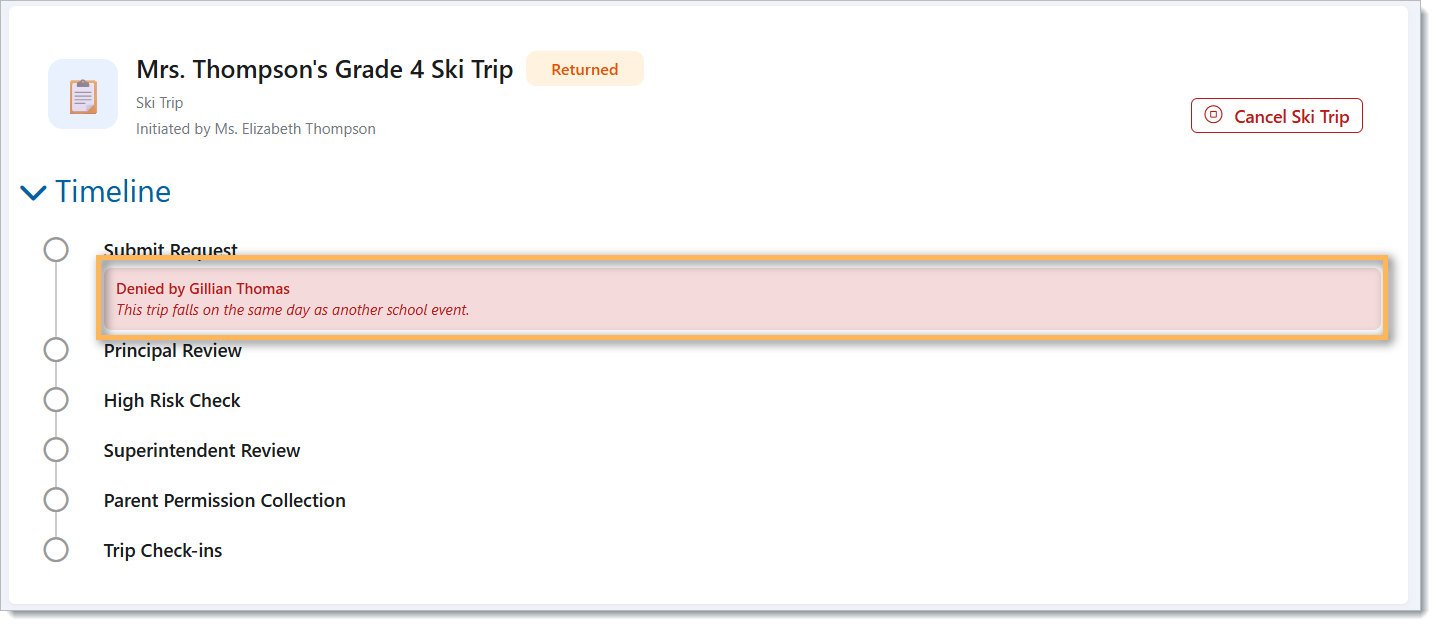
If the trip has been denied, teachers will see who denied it and why it was denied under ‘Submit Request’.
Once the trip has been approved, permission forms can be distributed by the office head to parents. Teachers can view parent responses and open a table view, including information from the permission form.


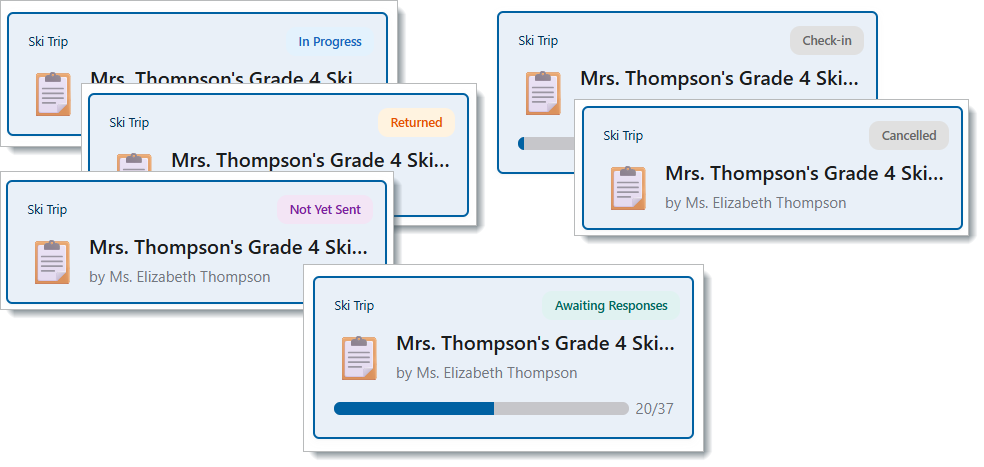
The progress bar indicates how many responses have been received, and the status flag indicates which stage the workflow is currently in.
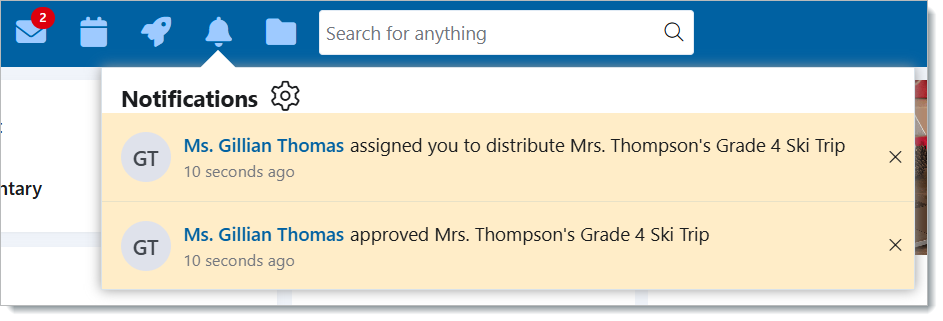
If teachers have notifications enabled, they will receive updates about their trip. Teachers will also receive notifications in their Edsby mailbox when the trip’s status has changed.
Once the distribution stage has been closed by the office, teachers can create check-ins for the trip and print passes. The students will travel by bus to the ski resort for this trip. Mrs. Thompson would like to create a check-in for students when they board the bus in the morning and another when they board the bus in the afternoon, so she will click New Check-in and create 2 check-ins. Check-ins can be named.
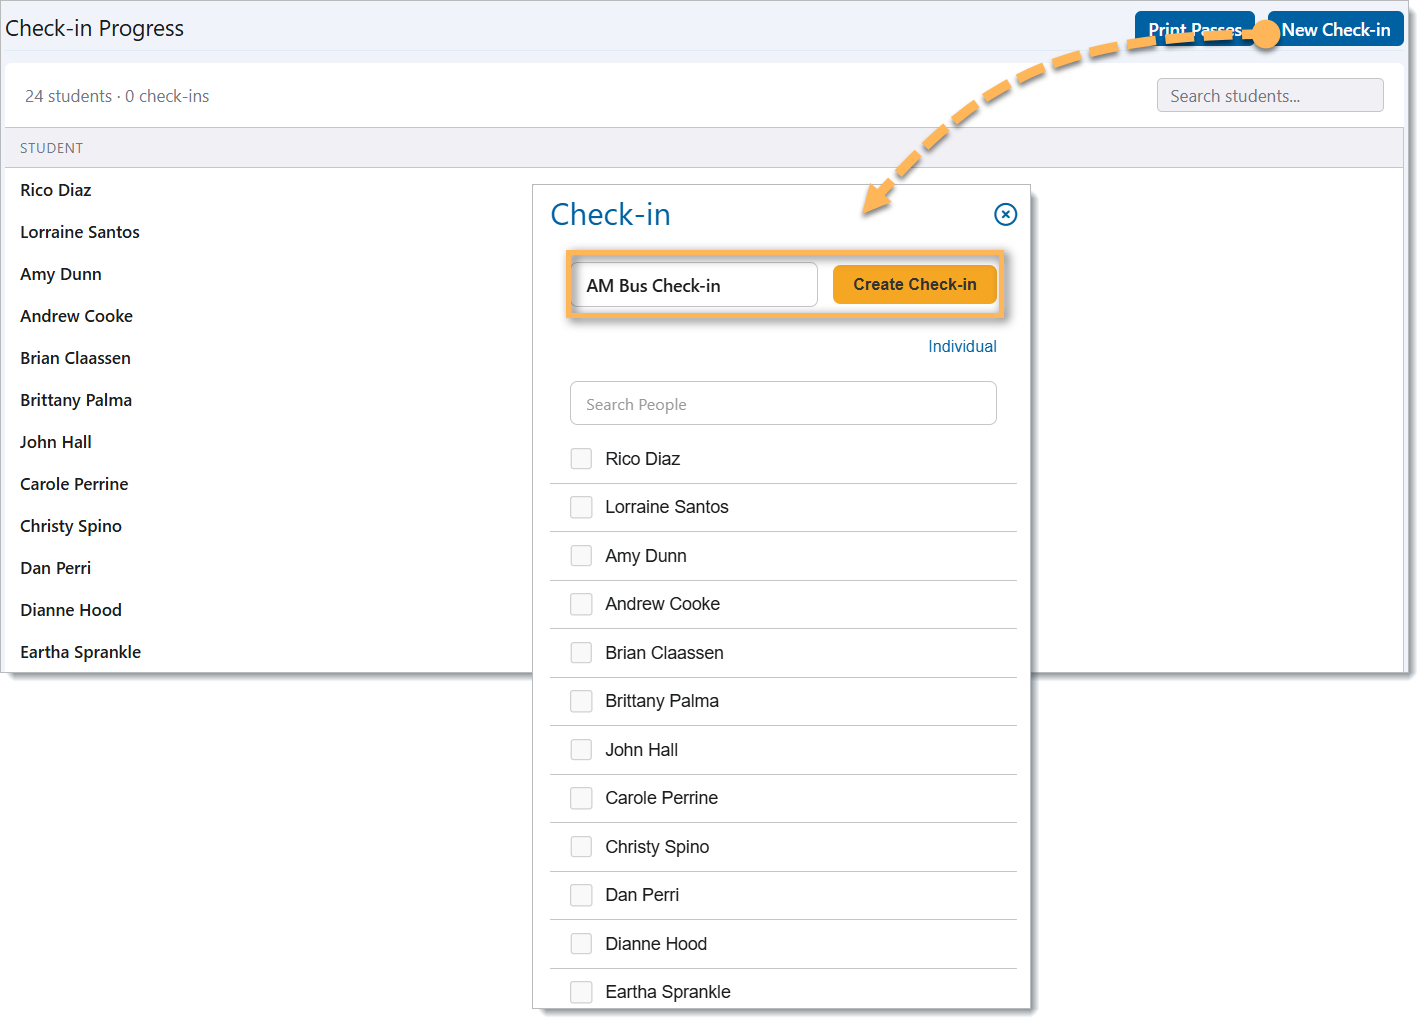
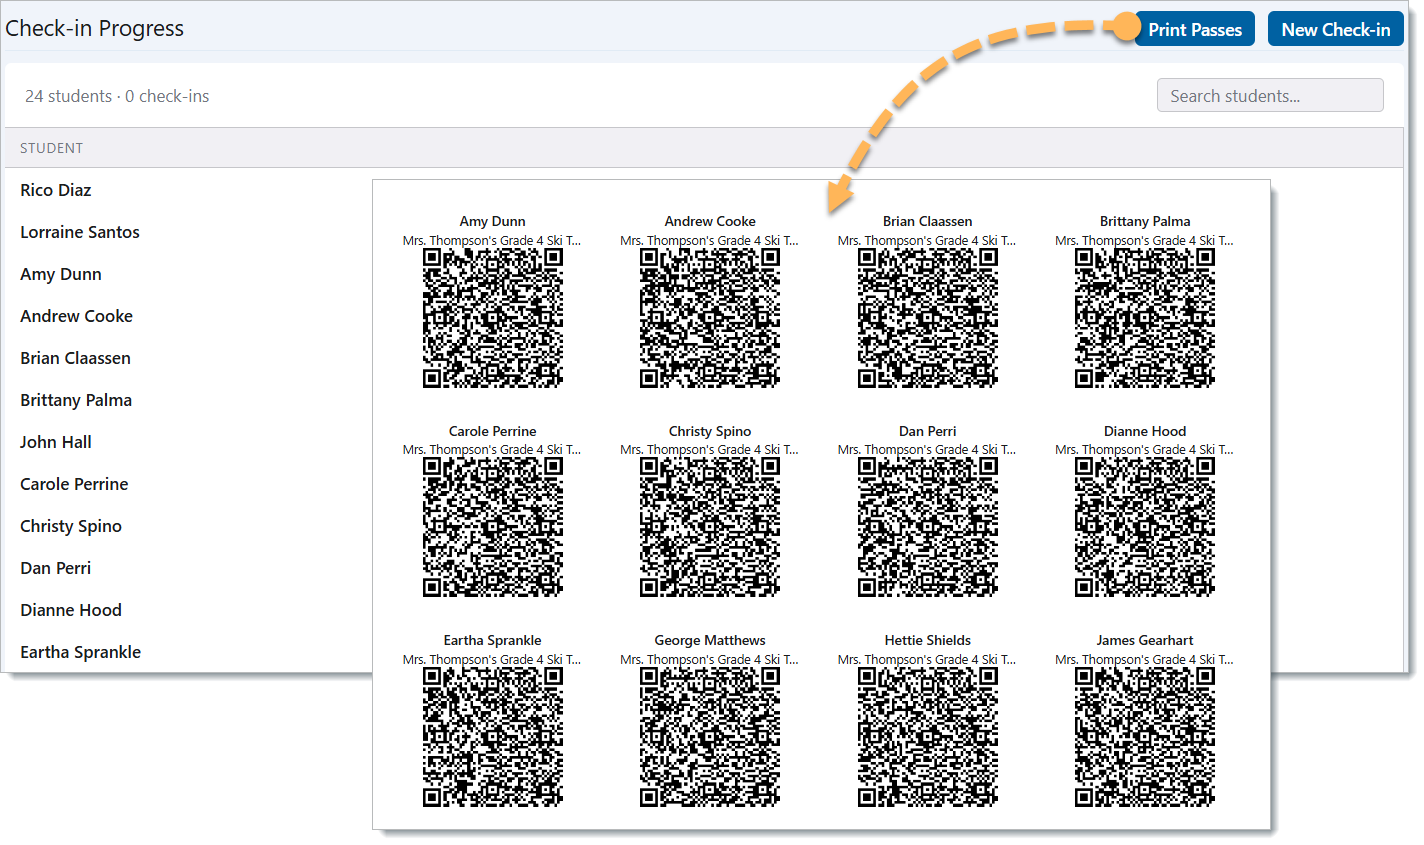
Once check-ins have been created, they can be activated when it is time to check students in for the trip. Teachers can create as many check-ins as they want. Passes can also be printed for students in the form of a QR code by clicking ‘Print Passes’.
Once the check-in has been activated, teachers can either scan the QR codes of the students present on the bus or select them manually from the list. Students can be selected individually, and notes can be added to students here.

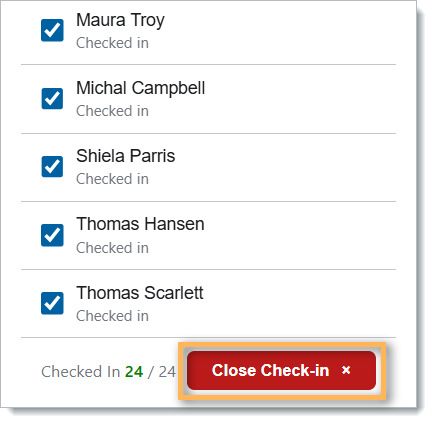
Once all students present have been checked in, teachers can close the check-in by clicking ‘Close Check-in’ at the bottom of the student list. Mrs. Thompson is going to repeat this process for the afternoon bus ride back to the school. Teachers can reactivate any check-in by selecting it and clicking ‘Open Check-in’.
When the trip is complete and all check-ins have been closed, teachers can close the check-in stage of the workflow.
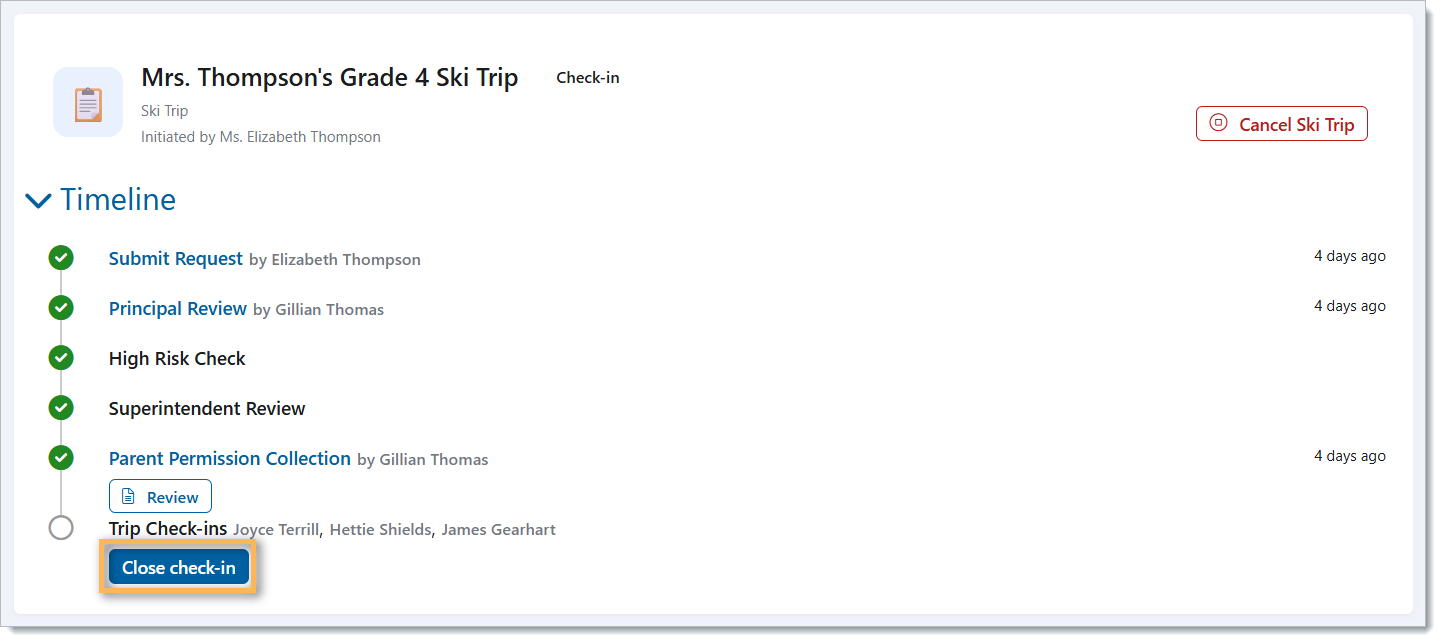
Once the trip is complete, teachers will see the trip status change to ‘Completed’. Information about the trip can still be viewed by clicking on the blue text or the review button.

Teachers can cancel a trip at any stage. The trip will be flagged as cancelled, and the Workflow will show which stage the trip was cancelled at. The office will see that the trip has been cancelled by the teacher. The office cannot cancel a trip; it must be done by the teacher.
